
A Guide to The Aurum Vale Dungeon in Final Fantasy XIV
A complete guide to The Aurum Vale Dungeon in Square Enix's critically acclaimed MMORPG Final Fantasy XIV.


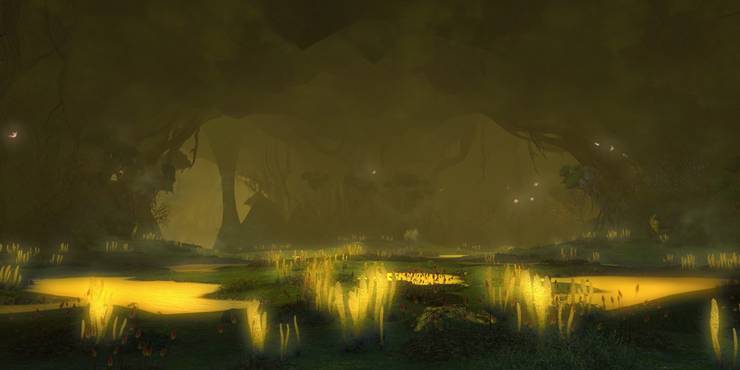
The Aurum Vale is one of Final Fantasy 14’s most infamous dungeons, to the point that even mentioning the name can cause flashbacks in the most seasoned of FFXIV veterans. Located in the Coerthas Central Highlands, this golden swamp with a Bank Vault theme is a level 47 optional 4-player dungeon, with a level sync cap of 49.
The most common enemy faced in the Aurum Vale are the Morbols, so beware of their bad breath attack, as it can leave your Warrior of Light with a variety of Debuffs. Another ever-present threat in the Aurum Vale are the puddles of Gold Bile, which litter every area in the dungeon, and will do damage over time as long as your warrior is standing in them.
The first area of the Aurum Vale is labeled the Golden Pools, and as the name suggests, the area is just absolutely littered with Gold Bile. There are also several geysers around the pools that can shove you and your party members around if they happen to get caught up in a geyser eruption. Dotted around the room are a variety of enemies, including Elfstools, Lilies of the Vale, and large Nether Nix toads. The Giant Toads are the most dangerous of these threats, as they can grab party members and move them towards themselves, splitting the party, as well as possibly pulling them into Gold Bile, or even alerting more enemies. Most Adventuring parties try to avoid the area as much as possible by sticking to the left wall, and only fighting enemies that initiate first.
After passing through the Golden Pools, your party will encounter the first boss of the Dungeon, the Locksmith. Before the fight begins, your party will notice several Morbol Fruits dotted around the room. These Fruits can be eaten during the fight with an interaction prompt, and this can be used to great effect during the fight.
The Locksmith has 3 attacks to choose between. Hundred Lashings is a very damage heavy attack directed at the Locksmith’s target, most usually the tank. Gold dust is an AOE attack centered on one of the party members which can be avoided as long as everyone leaves the indicated area in time. Last but certainly not least, there’s Gold Rush. This attack applies the debuff Gold Lung to everyone in the party. Gold Lung deals damage over time, and the only way to remove the debuff is to eat Morbol fruit, which will clear away all stacks of Gold Lung, but respawns slowly, meaning that players can’t just gorge themselves after each Gold Rush, as they’ll quickly run out. Whittle away at the Locksmith’s health until they fall, spawning more Morbol fruit for the party and unlocking the way forward.
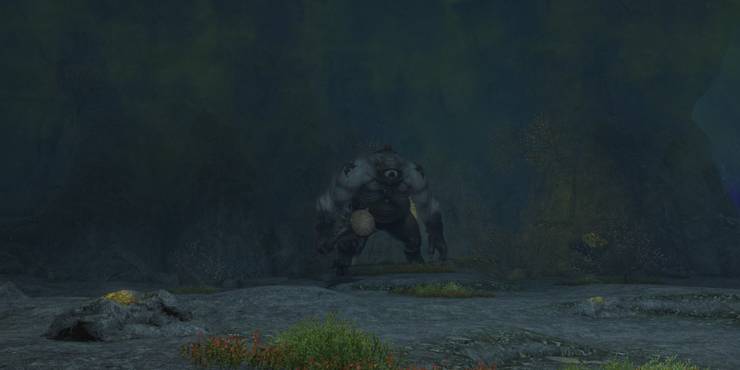
After making your way past the Locksmith, you’ll have to contend with the Coincounter, the second boss of the dungeon. Their room is free of Gold Bile; a good thing too, as all of the Coincounter’s 5 attacks have an AOE element. 10-tonze Swipe is a AOE Cone originating from the front of the Coincounter, dealing damage to everyone in the cone. The similarly named 100-tonze Swipe acts very much the same, but with an additional knockback effect on everyone caught in the cone. The last of the almost-same-name attacks is 100-tonze Swing, an AOE circle centered on the Coincounter, which deals the highest damage of the three, as well as the knockback shared by the 100-tonze Swipe. Glower, their next attack, is a line AOE aimed at a random member of the party, and can inflict Paralysis as well as dealing damage. The Coincounter’s last attack is Eye of the Beholder, whose AOE is absolutely massive, a cone extending from the front and both sides of the Coincounter, this attack inflicts the Electrocution debuff, dealing damage over time. Your party will need to evade the AOE indicators and fell the Coincounter to progress to the final boss of the dungeon, the Miser's Mistress.

Miser’s Mistress is a boss fight very similar to the Locksmith in some ways. Once again, Gold Bile coats the floor, and Morbol Fruit is once again necessary to remove a boss-applied debuff, this time by the name of Burrs. As a Morbol, one of Miser’s Mistress's attacks is, of course, Bad Breath, detailed earlier in this guide. Their other attacks include Vine Probe, a similar attack to Hundred Lashings, as it is centered on her main target, though unlike Hundred Lashings it is an AOE attack centered on the target. Burr Burrow gives all players the Burr debuff. Unlike Gold Lung, Burrs do not do damage over time, but instead do a flat amount of damage depending on how many stacks of burrs you already possess. Hooked Burrs is a similar attack, but only focused on one random party member. Miser’s Mistress’s last attack is Sow. They will move to a different part of the arena and spawn a number of Morbol fruits. If these fruits are left alive, they will begin to germinate and grow into Morbol Seedlings. After dealing with the Miser’s Mistress, your journey through the Aurum Vale will be over, and you’ll come away with a story to tell, a FFXIV rite of passage conquered, and maybe even a Morbol Seedling minion. Good luck Warriors!