
Vow of the Disciple Raid Guide
A complete guide to the Vow of the Disciple Raid in Destiny 2


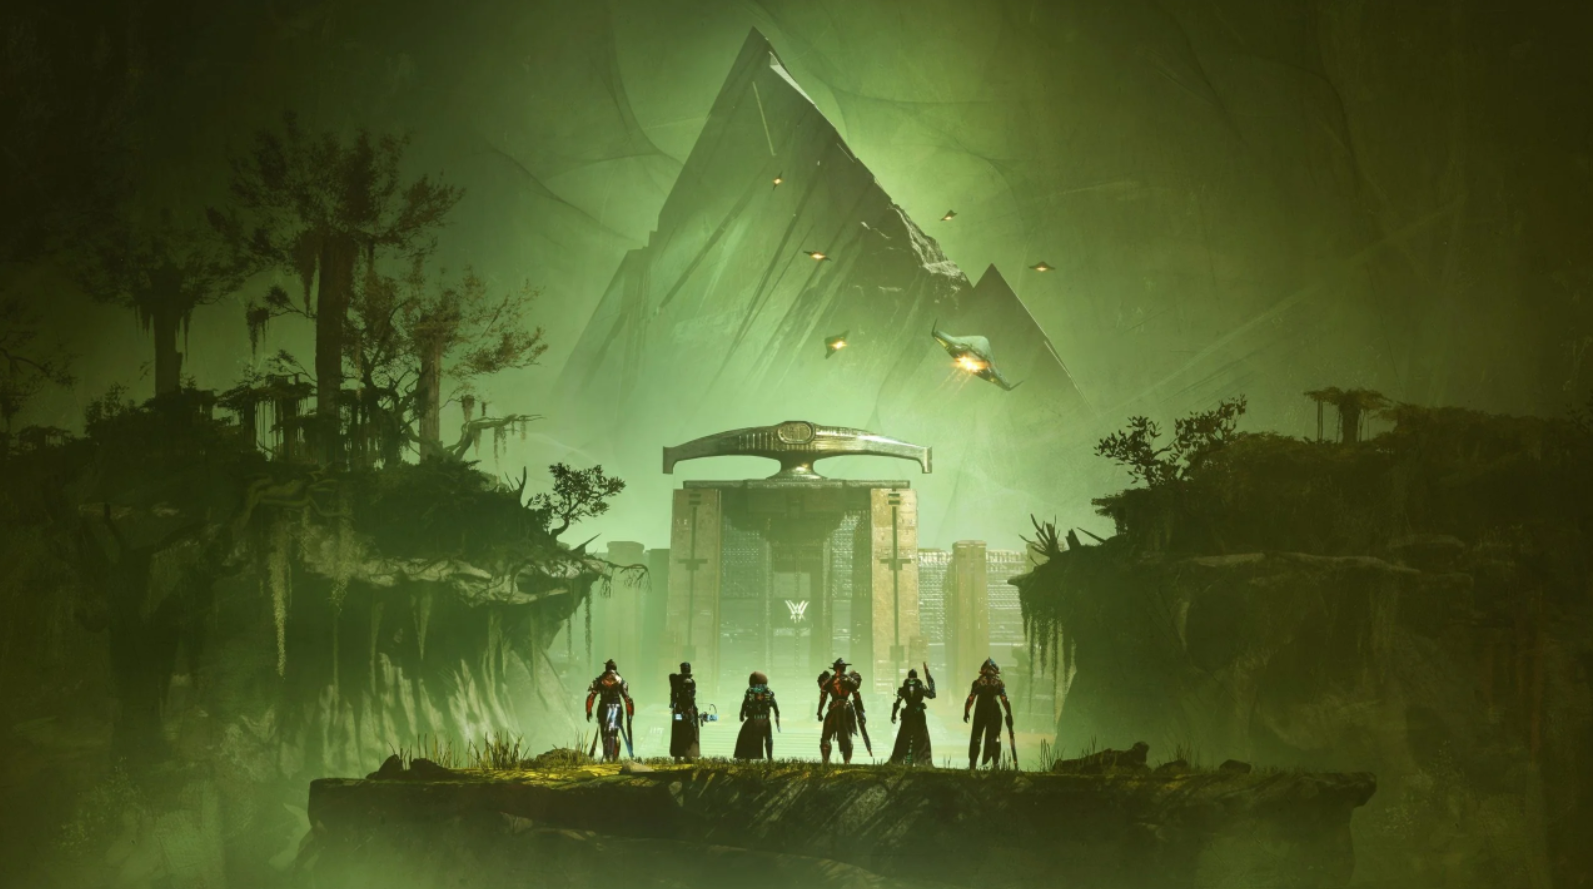
The Vow of the Disciple is the newest raid in Destiny 2, and by many accounts, the most difficult. Before you dive in to face the Disciple of the Witness, you will want to give your guardian every advantage. You never know what mistake could be your last.
As you and your fire team touchdown, you’ll be confronted by a reflection of Savathun. Defeating them will allow your team to approach the barge. Enemies will start spawning in, and you may notice a stack of Pervading darkness clouding your guardian’s vision. Straying too far from the barge will cause you to gain additional stacks, up to 10, which will immediately kill your guardian. This debuff will be present throughout the entire raid, so be sure to keep an eye on your stacks. In this encounter, you can cleanse yourself of the darkness by killing Scorn Abominations.
In order for the barge to start moving, it requires knowledge. The required knowledge can be acquired by killing Knowledge bearers and picking up the orange collectable. Guardians can collect up to three before needing to offload them to the barge. Once the barge is full, it will start moving until it needs more knowledge again, at which point your team will need to fill it up again. After around 6 refills, the barge will have taken you to the Pyramid. Enter guardian, your true trials start here.
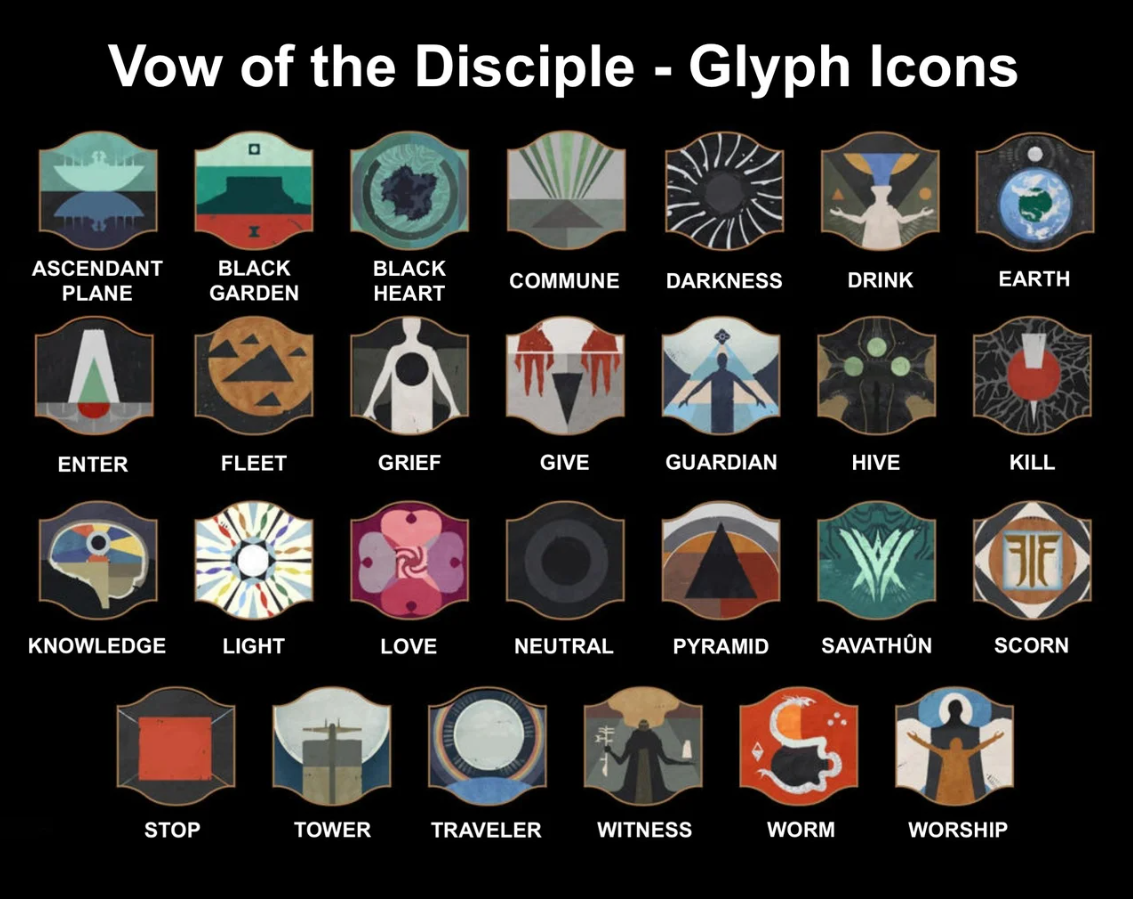
With the start of the Acquisition encounter comes another mechanic that will last until the end of the raid, the list of symbols displayed below. The image lists Bungie’s official names for each of the symbols, but of course, that won’t stop other guardians from calling it whatever they feel like, so try to familiarize yourself with what they look like as well. It could be necessary to decipher what a teammate is saying.
The room has three obelisks, with each obelisk having a pillar and three temples. In the center of the room are two symbols, splitting the room into halves. To start the encounter, shoot the floating pyramid in the center of the room. This will open some of the temple doors. Shooting the floating pyramid will toggle which doors are open for the rest of the encounter. Enemies will start to spawn, the Obelisks will start charging a team wipe, and one of the pillars will display a symbol, indicating where a Compass knight is about to spawn. The Knight’s death will reveal 2 symbols, one on the same pillar, and one on a new pillar.
The new pillar’s symbol shows where the next Knight will spawn, and the one on the old pillar indicates what temple to venture into. Upon entering the temple, the third symbol on the pillar will be revealed, indicating which of the two Scorn Glyphkeepers found in the temple needs to have their Glyph revealed. Killing that Glyphkeeper will reveal the symbol they were hiding, and also drain the obelisks of their energy. This is repeated for all of the pillars, which will reveal the first code, which can be input into one of the three obelisks, causing another energy drain. This process is then repeated until all three obelisks have accepted their code. At this point, the doors open, and the Caretaker will be ready to see you.
The Caretaker is the first boss fight of the raid, and the giant's room is similarly monumental. Taking up four floors, each grows more precarious as they go higher and higher, with less and less floor space each level. The first three floors have a temple, an obelisk, and 3 plates. The Caretaker will attempt to make their way to the obelisk in order to team wipe. The Caretaker cannot take damage unless your guardian is shooting at them from a glowing plate, but shooting them enough will earn your guardian the debuff Caretaker’s Gaze, which will let your guardian shoot the Caretaker in the face to open up a weak spot on their back. Exploiting this weak spot will cause the Caretaker to fall to their knees, stopping their progress towards the obelisk.
Meanwhile, in order to progress, a guardian will need to shoot the crystal next to the temple door, which will allow them to run inside and collect 3 runes. While inside the guardian will gain stacks of Pervading darkness, but also has the opportunity to collect symbols. Once they have three, the guardian should run to the entrance and get a member of the fireteam to shoot the crystal so they can leave. The fire team then needs to input the symbols collected into the obelisk, initiating a damage phase, where plates will glow for short amounts of time. Doing this three times will unlock the next floor, and this must be done for each floor’s obelisk. Once the first three floors are done, the final phase begins. No more obelisks, just your team on glowing plates and the Caretaker. One of you will do more damage. Is it going to be you?
If you and your team survived the Caretaker, it’s time to move on to the Exhibition. The encounter starts when you take the first relic of the encounter, the Darkness Laser. Your team was not meant to journey this far, and so you’ll be subject to a debuff called Terminal Resonance once the encounter starts. If the timer gets to 0, you’ll die. Thankfully, the Laser is the only weapon that can kill the Taken Knights, whose deaths will extend your lives.
The Encounter is made of 4 rooms, and each room requires a code to progress. Killing glyphkeepers will reveal the code, but only relic holders can see the Taken half of the code, and only non relic holders can see the Scorn half. The two groups must communicate and find the common symbol to progress. The first room only requires one symbol to progress to the rest area. Entering the rest area refreshes your Terminal Resonance, and the relics must be dropped in slots to open up the next room. Dropping a relic means your guardian cannot pick up any relic for another 30 seconds. Enemies can still spawn in rest rooms, so be on your guard.
In the 2nd room, another relic appears: the cleansing shield from Vault of Glass, which can be used to cleanse the Pervading Darkness debuff that the rest of the rooms carry. In this second room, there will be 2 waves of Glyphkeepers, and so 2 symbols needed to progress. This will be the same for all following rooms. The third room adds the Eye of Riven relic, which is used to destroy Taken Orbs that can make certain enemies immune to damage. The fourth room doesn’t add another relic, but is the largest out of all the rooms. As is befitting for the entryway of the Disciple.
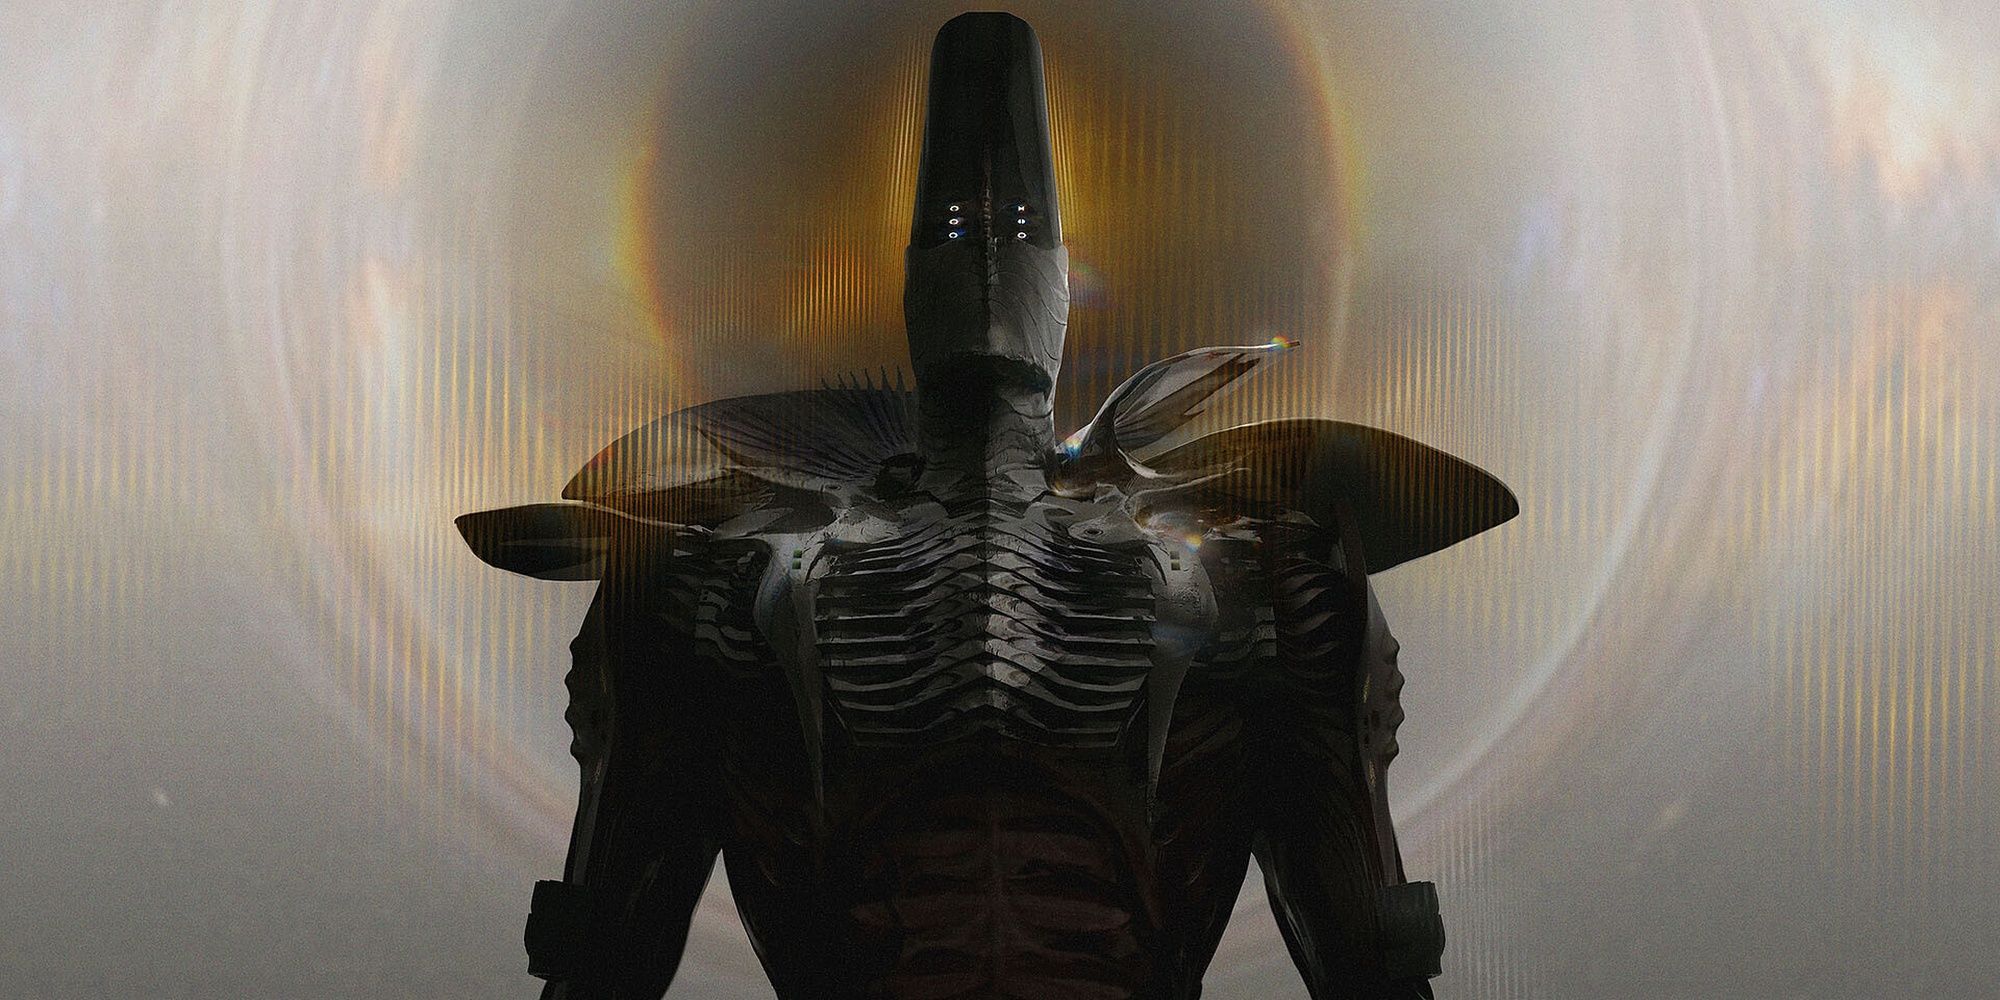
It all comes down to this. Rhulk, Disciple of the Witness. They stare out on your team as you approach, sending you back with their shield and summoning a crystal of darkness to kill your team with Pervading Darkness. Destroying the crystal will give your guardian the debuff Leeching force. There are two ways to use this debuff. Standing on the starting panel will cause two more crystals to form. If your teammates break the crystals, the force will transfer from your guardian to theirs. The other method is to jump into Rhulk’s beam attack, which will change the Leeching force into an Emanating force, which allows your guardian to move past Rhulks barriers. When no one has the Leeching force debuff, Rhulk will cast another Dark Crystal. If Rhulk spawns 3 of these, the team will wipe.
As enemies start spawning in, soon enough Glyphkeepers will as well. Killing them will reveal symbols, but much like the Exhibition, not everyone can see every symbol. Guardians with the emanating force buff and guardians without it will need to coordinate to discover the matching symbol, at which point the non-buffed guardians can check the six pillars around the room. Whichever pillar has a matching symbol can be interacted with by the buffed guardians, causing them to lose the buff and pushing back Rhulk’s shield. This must be done 6 times to reach the damage phase.
Once Rhulk’s shield is gone, they will invite you into their chamber. Each of the four corners has a different symbol. Now the fight proper begins, but the damage phase hasn’t quite started yet. First, 4 weak spots need to be activated and destroyed in a similar way to the previous phase. Destroying one of Rhulk’s polearms will give your guardian the Leeching Force, and show the correct symbol to the other guardians. Jumping into the beam attack will change Leeching Force into Emanating force, and the force can be deposited into the correct corner to activate a weak spot for destruction. Once all four weak spots are destroyed, the damage phase properly begins. The room grows red, Rhulk grows vulnerable and changes their attacks. Then the room returns to normal. Rinse and repeat up to 3 times, or until Rhulk takes their last stand. Pervading darkness enters the room, Rhulk won’t relent until death, which is now the only thing that can save your lives. Will your team have what it takes to bring them to their knees?